Category Archives: Uncategorized

White Corn Guacamole

California Pizza Kitchen has a “small plates” menu which contains white corn guacamole.  The first time we had it, we were like “5 dollars for this small mound of guacamole?  Not worth it”.  Inexplicably, we have ordered it every single time since then. It has a mild flavor but it’s so tasty paired with the salty tortilla chips.  For a recent special dinner I decided to take my first stab at re-creating a restaurant dish and I have to say it turned out quite successfully.  If you like guacamole, give this a try, and even if you don’t like guacamole give it a try because the two are quite different.

I have never worked with jicama before, so I wasn’t sure how to deal with it.  Note to self: (and you) jicama does not take well to peeling.  I cut off a good inch-wide slice of the root and peeled it, only to have it crack in half and go straight down the garbage disposal.  From then on, I cut away the skin with a knife and that worked much better.

Another note to self: There is a reason why guacamole is much more popular in the summer. All the avocados in March were major crap-ola.  I bought a hard avocado in hopes that it would ripen in a few days to become part of my beautiful dip.  No such luck.  This avocado was so hard.  I managed to get half of the flesh out with the spoon, but when I bit into it, holy chipped tooth.  That fruit (vegetable?) was hard as a rock.  Note that although this dip is superior when made with the addition of soft, buttery avocado, it’s still quite delicious without it.

We thought it mimicked the guacamole at CPK pretty accurately, and it cost much less than 5 dollars per serving!

Ingredients:

  • 1 avocado, diced fine
  • 1/2 cup sweet white corn
  • 1/4 cup black beans
  • 1/4 cup jicama, diced fine
  • 1/2 cup onions, diced fine
  • 1/2 of one red bell pepper, diced fine
  • 1 serrano pepper, diced fine
  • 1 handful of cilantro, chopped
  • 1/2 lime
  • 1/2 tsp of salt

Instructions:

  1. Combine all ingredients in a medium-sized bowl, and serve with tortilla chips.  Feel free to adjust ingredients according to your taste.

Grilled Ches

Last night I had the best grilled cheese of my entire life. Granted, up to the time I was in college, I thought grilled cheese
could only consist of the gross orange slice wrapped in plastic. Therefore, I never ate it because I hate that cheese and it
never crossed my mind that you could possibly use a different type of cheese. A few weeks ago I whipped up a grilled cheese
with pepper jack, tomato, and onion. Omg. I die. It was so good. But this one is dare I say better than that. And
I love pepper jack way more than mozzarella so that’s saying something. And it’s SO simple, as all grilled cheese should
be. I made dinner in literally 10 minutes. After tasting it, I asked Kevin if it was better than the gross orange cheese….and
he shrugged. Kevin has the palate of a 5 year old. Don’t listen to him. I almost made it for breakfast the next morning for
myself.

I’m not going to even bother typing out the ingredients and directions because it is so easy. First, you head your skillet or
griddle to medium heat. Then butter up one side of each slice of bread. Butter is crucial. It makes the bread golden brown
and crunchy and delicious and why deprive yourself of golden brown crunchy deliciousness? Slice some fresh mozzarella
and layer it on the non-buttered side of a piece of bread. Spread 1 tablespoon of pesto on top of the cheese, and put the bread
buttered side down onto the hot grill. Add the other piece of bread on top. Cook for a few minutes until the bottom is golden
brown and then flip it. Then cook until the cheese is melty and delicious. If using a Griddler or something similar, just put
the top of the griddler down and both sides cook at once! Amazing! I served this with some canned soup for a super quick
meal and it was so satisfying.

Oh dear

Oh my

Grilled Cheese Heaven

Recipe from Simply Scratch


Chicken Enchilada Casserole

Mexican food: I could eat it all day every day.  Tacos, enchiladas, quesadillas, nachos, guacamole and anything with cilantro. By the way, what’s with the people who think cilantro tastes like soap?  Have they ever eaten guacamole without cilantro?  It’s like peanut butter without chocolate; spaghetti without meatballs; gin without tonic.  All good, but the addition of that second component makes it worlds better.  I plan to grow a cilantro plant this summer so I can have fresh deliciousness at my fingertips.  I have a bit of a black thumb though so we’ll see how that turns out.

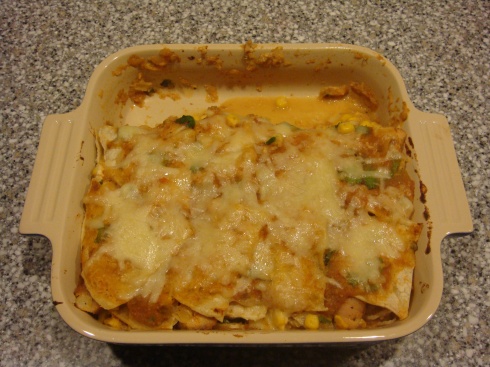
I found this enchilada casserole in Cooking Light Magazine and had to make it immediately.  I put on the menu for the week and made sure I had all the ingredients.  It seemed like it might be time intensive so I prepared most of the dish the night before and it took less than half an hour the next night.  Time intensive was an under-statement for this dish.  Holy time-suck.  Mostly it was because I was simultaneously making some delicious chocolate-walnut-banana bread so I was in the kitchen for roughly 3 hours preparing this dish and the bread.  A mighty productive night if you ask me!

I used 2 things in this recipe that I don’t usually use, but since they called for it I figured I would follow the recipe.  I used corn tortillas and chicken thighs, where I would usually use flour tortillas and chicken breasts.  Since the corn tortillas absorbed the liquid in the dish, they weren’t as hard as I usually find them to be so I would definitely use them again.  I’m not sold on the chicken thighs though, I’m much more of a white meat kinda gal.  Kevin loves dark meat, though so I promised I would incorporate it more in our dishes.  This is a good place to use the dark meat because there are so many other flavors and textures going on you doesn’t focus on the slimy chicken (blech).

This dish is a little spicy, so cut down on the cayenne if you cant handle the heat.  I kind of wished I cut back because my lips were uber-chapped so they felt like they were on fire while eating it.  But believe me, that didn’t stop me from shoveling bite after bite into my mouth.

This dish is very good and it will definitely be in our rotation.  If you have some already cooked chicken that will definitely save some time in this dish and even make it possible to prepare it the same night as eating it.  So yummy.  It’s already in my Tupperware for tomorrow’s lunch.

Yum.


Here is the recipe, adaped from Cooking Light:

Ingredients:

  • 1 lb boneless chicken thighs
  • 1/3 cup fresh cilantro, divided
  • 1 cup canned corn
  • 1/3 cup (3 oz) 1/3-less-fat cream cheese, softened
  • 1/2 tsp cayenne pepper
  • 1/2 tsp cumin
  • 1/4 tsp kosher salt
  • 1/4 tsp black pepper
  • 2 cups chopped onions, divided
  • 6 garlic cloves, minced and divided
  • 1 cup low-sodium chicken broth
  • 2/3 cup salsa
  • 1/4 cup water
  • 1 fresh jalapeno
  • 9 corn tortillas (6-inch)
  • 1/2 cup shredded sharp cheddar cheese

Directions:

  1. Preheat oven to 425 degrees.
  2. Heat a large ovenproof skillet over medium-high heat.  Coat pan with cooking spray.  Add chicken to pan; saute 4 minutes on each side.  Place skillet in oven; bake at 425 degrees for 10 minutes or until done.  Remove chicken from pan and let stand for 15 minutes.   Chop or shred the chicken, and put it in a medium bowl.  Add 1 1/2 tablespoons of cilantro, corn, and next 5 ingredients (through black pepper) to chicken and toss to combine.
  3. Return pan to medium-high heat.  Add 1/2 cup onion; saute 5 minutes, stirring occasionally.  Add 3 garlic cloves and saute for 30 seconds, until fragrant.  Add onion mixture to chicken mixture and stir to combine.
  4. Combine remaining 1 1/2 cups onion, remaining 3 cloves garlic, broth, salsa, 1/4 cup water, and jalapeno in a medium saucepan over medium-high heat; bring to a boil.  Reduce heat, and simmer 15 minutes, stirring occasionally.  Remove from heat; let stand 10 minutes.  Add 2 tablespoons of cilantro and blend in the pan using an immersion hand blender.  Alternatively, transfer the mixture to a blender and process until smooth.
  5. Heat a large skillet over medium-high heat.  Add 2 tortillas; cook 1 1/2 minutes on each side.  Remove tortillas from pan and repeat procedure with remaining tortillas.  Cut tortillas into quarters.
  6. Spread 1/2 cup salsa mixture in the bottom of an 8-inch square glass or ceramic baking dish coated in cooking spray.  Arrange 12 tortilla quarters over salsa mixture.  Spoon hald of chicken mixture over tortillas.  Repeat layers, ending with tortillas.  Pour remaining salsa mixture over tortillas; sprinkle evenly with cheddar cheese.  Bake at 425 degrees for 15 minutes or until bubble and lightly browned.  Top with remaining cilantro.

Note: In order to make this a week-night meal, cook chicken and prepare salsa mixture and chicken mixture the night before or on the weekend.  Then, on the night of, heat the tortillas in the skillet, assemble casserole, and bake.  I wouldn’t recommend preparing the entire casserole the night before, because the tortillas will get way too soggy.

Don’t let the long directions discourage you from trying this meal.  It’s super tasty, and totally worth the time.  It’s even better the next day, and I was sorry when we ran out.


Homemade Thin-Crust Pizza

This pizza is so good.  And not as difficult as home-made pizza seems.  It’s definitely the most delicious and fool-proof pizza dough recipe I have tried and I will continue to use this recipe.  I even botched the steps a bit and used different yeast but it still turned out great.  If a recipe is stamped with the approval of Cook’s Illustrated/ America’s Test Kitchen, it’s pretty much guaranteed to be good.  That being said, they have a lot more practice than you so yours might not turn out as pretty as theirs….

What it’s supposed to look like:


Ummm yeah….not quite.

But I promise!  It’s still delicious, no matter how deformed.
I let the dough sit for an hour, like it said, but it was still quite cold.  Once I started working with it, it quickly warmed up and was not very cooperative.  Then I made the mistake of thinking I could simply lift the pizza off the cutting board onto the baking sheet in the oven…yeah, not going to happen.  So after a lot of struggling I jammed some parchment paper under the pizza until most of it was on there so I could slide it onto the baking sheet.  Hence, the hideous appearance.  With the next pie I was smart enough to start on parchment paper for easy transport.  I also left that dough thicker, so you don’t have to keep it thin like the name suggests.  The recipe for sauce is also super easy and delicious, and it makes extra so you can save it for your next pizza adventure or use it on pasta.  Use any toppings you like, but their combination of mozzarella and parmesan was delicious.  Try it soon! You wont be disappointed.

Here is the recipe, from Cook’s Illustrated Magazine:

Ingredients:

Dough

  • 3 cups (16 1/2 ounces) bread flour , plus more for work surface (see note)
  • 2 teaspoons sugar
  • 1/2 teaspoon instant or rapid-rise yeast (I used 3/4 tsp of regular yeast)
  • 1 1/3 cups ice water (about 10 1/2 ounces) (see note)
  • 1 tablespoon vegetable oil , plus more for work surface
  • 1 1/2 teaspoons table salt

Sauce

  • 1 (28-ounce) can whole peeled tomatoes , drained and liquid discarded
  • 1 tablespoon extra-virgin olive oil
  • 1 teaspoon red wine vinegar
  • 2 medium garlic cloves , minced or pressed through garlic press (about 2 teaspoons)
  • 1 teaspoon table salt
  • 1 teaspoon dried oregano
  • 1/4 teaspoon ground black pepper

Cheese

  • 1 ounce finely grated Parmesan cheese (about 1/2 cup)
  • 8 ounces whole milk mozzarella , shredded (about 2 cups)

Instructions:

1. FOR THE DOUGH: In food processor fitted with metal blade, process flour, sugar, and yeast until combined, about 2 seconds. With machine running, slowly add water through feed tube; process until dough is just combined and no dry flour remains, about 10 seconds. Let dough stand 10 minutes.

2. Add oil and salt to dough and process until dough forms satiny, sticky ball that clears sides of workbowl, 30 to 60 seconds. Remove dough from bowl and knead briefly on lightly oiled countertop until smooth, about 1 minute. Shape dough into tight ball and place in large, lightly oiled bowl. Cover tightly with plastic wrap and refrigerate for at least 24 hours and up to 3 days.

3. FOR THE SAUCE: Process all ingredients in food processor until smooth, about 30 seconds. Transfer to medium bowl or container and refrigerate until ready to use.

4. TO BAKE THE PIZZA: One hour before baking pizza, adjust oven rack to second highest position (rack should be about 4 to 5 inches below broiler), set pizza stone on rack, and heat oven to 500 degrees. Remove dough from refrigerator and divide in half. Shape each half into smooth, tight ball. Place on lightly oiled baking sheet, spacing them at least 3 inches apart; cover loosely with plastic wrap coated with nonstick cooking spray; let stand for 1 hour.

5. Coat 1 ball of dough generously with flour and place on well-floured countertop. Using fingertips, gently flatten into 8-inch disk, leaving 1 inch of outer edge slightly thicker than center. Using hands, gently stretch disk into 12-inch round, working along edges and giving disk quarter turns as you stretch. Transfer dough to well-floured peel and stretch into 13-inch round. Using back of spoon or ladle, spread 1/2 cup tomato sauce in thin layer over surface of dough, leaving 1/4-inch border around edge. Sprinkle 1/4 cup Parmesan evenly over sauce, followed by 1 cup mozzarella. Slide pizza carefully onto stone and bake until crust is well browned and cheese is bubbly and beginning to brown, 10 to 12 minutes, rotating pizza halfway through. Remove pizza and place on wire rack for 5 minutes before slicing and serving. Repeat step 5 to shape, top, and bake second pizza.

My note: I have neither a pizza peel or pizza stone, so I used parchment paper to take the dough from counter to oven, and a pre-heated upside-down baking sheet as a stone.  It worked just fine, you just have to be careful because 500 degrees is a little hot for parchment paper and it can burn and get very brittle.


Tuscan Style Chicken Sandwiches

I wonder why it is that every time a recipe is supposed to be quick, it always takes me twice as long as it should.  If you’re good at multi-tasking, this meal will take you 15 minutes.  Me, on the other hand, took 45 minutes to get this meal on the table.  Sometimes I do one step of the recipe, then just kind of stand and stare at the recipe, or into space, thinking random thoughts.

The pesto mayonnaise is an essential flavor in this recipe so don’t skip it!  I used store-bought but obviously home-made would be ideal.  So if you have some leftover or if you’re an over-achiever, use home-made.

Artichokes: gross-looking, kind of looks like guts or ears or squid.  Very tasty though.  Tart and tangy and deelish.

I used focaccia bread but I don’t think I would use it again.  It was hard to take a bite since it was thick and didn’t squish down very good.  Next time, I would just use a regular bun and probably toast it so the cheese would get melty and gooey and the whole sandwich would be heated through.

I used spinach instead of mixed greens because I had it in the fridge and what are mixed greens anyway?

Try it, its super easy and quick.  Seen on Epicurious

Ingredients:

•    1/4 cup mayonnaise
•    4 teaspoons prepared pesto
•    2 4×4-inch squares focaccia or ciabatta
•    2 skinless boneless chicken breast halves
•    Olive oil
•    4 thin slices fresh mozzarella (I used shredded, because that’s what I had but next time I would use fresh)
•    2 canned artichoke hearts, drained, thinly sliced
•    1 plum tomato, thinly sliced
•    1 cup mixed baby greens/ spinach

Directions:

1. Prepare grill (medium-high heat). Combine mayonnaise and pesto in small bowl; whisk to blend.

2. Brush chicken lightly with oil; sprinkle with salt and pepper. Grill chicken until just cooked through, about 5 minutes per side. Transfer chicken to cutting board; cool slightly. Cut chicken on sharp diagonal into 1/2-inch-thick slices (I kept them whole instead of slicing them to keep the juices in)

3. Spread pesto mayonnaise onto cut surfaces of bread. Layer chicken, mozzarella, artichokes, greens, and tomato onto bottom halves. Top with bread tops. Yum!


Sweet & Spicy Chicken Wraps

This is a very simple and tasty weeknight meal.  If you have chicken defrosting in the fridge it can come together in less than 30 minutes.  The combination of ingredients might seem a bit strange at first but the flavors really compliment each other and come together nicely.  The most difficult part of this dish is learning how to roll the wrap.  As soon as you master that skill, this is as easy as pie.  Which, can I say, isn’t really all that easy.  Making and rolling out pie crust? Whoever called that easy? This recipe is MUCH easier than making pie.

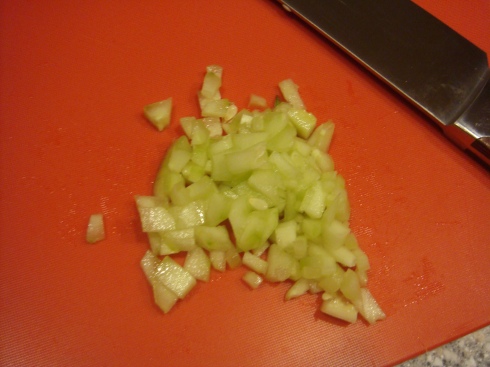
The first thing is to make the mayonnaise spread which involves chopping up the cucumber into a small dice.  The recipe calls for seedless cucumber but I think its just as easy to scrape a seed-ful cucumber with a spoon to get all the seeds out.  You’re cucumber will now be depressed with an empty soul but that’s okay because it’s about to be put to good use.  I used about 1/4 of a medium cucumber.  It was more than the recipe called for but I like it because it adds a crunch to the wrap.

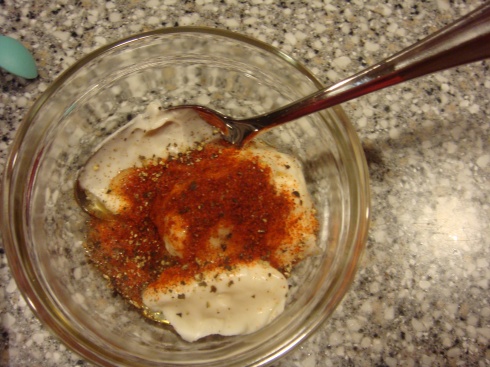
Combine the mayonnaise, honey, spices, and chopped cucumber to a small bowl and stir until combined.

Put this mixture in the refrigerator until it’s time to assemble the wraps.  The next step is to take your chicken breasts and cut them into thin strips.  I cut them them into bite-size pieces because I’m a rebel.  But strips really would have been easier because the wrap would be less prone to falling apart.  So don’t be like me, cut into thin strips.

Pour some olive oil in the pan over medium-high heat and cook the chicken until no longer pink, usually about 8-10 minutes.  Once it’s cooked, add the salsa, honey, and pepper and stir until combined.

Cook the mixture on medium-low heat for about 5 minutes until it reduces slightly.

As a kid I used to love taco night (and still do) but every time we would invariably forget to let the tortillas come to room temperature before serving. It would be impossible to roll the taco without the tortilla cracking and it led to some very frustrating, dinners. You had to eat the taco lightning-fast and at the perfect angle to prevent dripping and fillings dropping everywhere. Anyway, we finally discovered the secret to keeping tortillas warm and maleable. (not really a secret, seeing as how it’s printed on the tortilla package but that is neither here nor there.) All you have to do is take two paper towels, run them under a thin stream of water until damp, and squeeze out any excess, then place as many tortillas as you are making in between the two paper towels and heat for 30 seconds. If you are making more than 4 tortillas you should heat for 45 seconds. Voila! soft, warm tortillas for your taco, enchilada, or sweet and spicy wrap pleasure.

Now, it’s time to assemble our wraps! See how fast that was? First, spread a generous amount of the cucumber-mayonnasie spread. The recipe says a tablespoon-I say whatever floats your boat. Spread it on until the middle of the tortilla is covered.

Next, a layer of spinach. Again, as much or as little as your heart desires.

Next comes the chicken. If these were strips I would say about 3 strips.

Now comes the fun part. If you work at chipotle this should take you about 2 seconds but for the rest of us, step by step photos are below. First, you fold up the bottom about two inches. Next, starting from the left, you start rolling the tortilla. Once you have rolled about halfway, fold down the top. Then roll the rest of the way.

Enjoy!

Here is the recipe; seen on AllRecipes

Ingredients:

  • 1/2 cup mayonnaise
  • 1/4 cup finely chopped seedless cucumber
  • 1 tablespoon honey
  • 1/2 teaspoon cayenne pepper
  • ground black pepper to taste
  • 2 tablespoons olive oil
  • 1 1/2 pounds skinless, boneless chicken breast halves – cut into thin strips
  • 1 cup thick and chunky salsa
  • 1 tablespoon honey
  • 1/2 teaspoon cayenne pepper
  • 8 (10 inch) flour tortillas
  • 1 (10 ounce) bag baby spinach leaves

Directions:

  1. Mix together the mayonnaise, cucumber, 1 tablespoon of honey, 1/2 teaspoon of cayenne pepper, and black pepper in a bowl until smooth. Cover and refrigerate until needed.
  2. Heat the olive oil in a skillet on medium-high heat, and cook and stir the chicken breast strips until they are beginning to turn golden and are no longer pink in the middle, about 8 -10 minutes. Stir in the salsa, 1 tablespoon of honey, and 1/2 teaspoon of cayenne pepper. Reduce the heat to medium-low and simmer, stirring occasionally, until the flavors have blended, about 5 minutes.
  3. Stack the tortillas, 4 at a time, in a microwave oven and heat until warm and pliable, 20 to 30 seconds per batch.
  4. Spread each tortilla with 1 tablespoon of the mayonnaise-cucumber mixture, top with a layer of baby spinach leaves, and arrange about 1/2 cup of chicken mixture on the spinach leaves.
  5. Fold the bottom of each tortilla up about 2 inches, and start rolling the burrito from the left side. When the burrito is half-rolled, fold the top of the tortilla down, enclosing the filling, and continue rolling to make a tight, compact cylinder.

Egg-celent Egg Salad

Sorry, I couldn’t resist the egg pun.  I’m not really an egg person in general.  I’ll eat scrambled eggs if they’re cooked perfectly or if they’re not, smothered in ketchup.  Otherwise I never eat eggs on their own.  So I always assumed I wouldn’t like egg salad.  When I came across this recipe in a blog it just looked so pretty and yellow I had to give it a try, so I bookmarked it in my ever-expanding list of recipes to try.  When Kevin decided he wanted to randomly hard-boil some eggs one day, it gave me the perfect opportunity to try the egg salad.  I had him boil me a few more eggs and we were ready to go.  At first when I tasted it, I wasn’t too impressed and it kind of tasted like Old Bay.  If you’re into Old Bay, you could probably eat this by the handful.  (A handful of egg salad? Very classy.)  But, after I put it on some toast with some sliced onions and lettuce, it was really delicious and filling.  Next time I make this I will add chopped celery and onion to give it some texture variation.  I only had enough for one sandwich and Kevin ate the rest the next day by spoonful, so I guess he gives it two thumbs up.

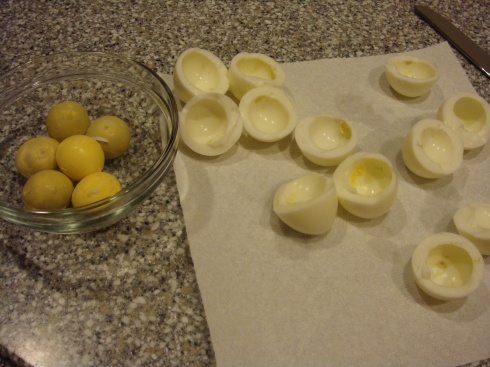
First, you peel the eggs and separate the yolks from the whites.  Mash the yolks in a small bowl and mince the whites separately.

Combine the diced whites with the mashed yolks. I suppose you can just dice the whites and yolks at the same time but where’s the fun in that?  Plus the thought of biting into a large piece of yolk kind of makes me gag.

In a separate bowl, combine the mayonnaise, pepper, curry powder (any kind will do), mustard, and salt.  I didn’t have dijon mustard that the recipe originally called for so I used dry mustard reconstituted with water.  I think this flavor in combination with the pepper is what gave it its old bay-ish flavor.

Pour the wet ingredients into the eggs and stir until combined.  If you find it is still loose you can add a bit more mayo or even mustard.  This is where I would add about 1/4 cup chopped celery and 1/4 cup chopped onion.  You can adjust and use all celery if you’re one of those weirdos who doesn’t like onions.  Pile on some toast and top with some lettuce or just eat with a spoon!

Here is the recipe, adopted from The Parsley Thief

Ingredients

  • 6 hard boiled eggs
  • 1/3 cup mayonnaise
  • 1/4 tsp ground pepper
  • 1/8 tsp curry powder
  • 1 tsp dry mustard (mixed with 1 tsp of water)
  • pinch of salt

Instructions

  1. Peel the eggs and separate the whites from the yolks.
  2. Mash the yolks with a fork, dice the whites, and them combine the two in a medium bowl
  3. In a separate bowl mix the mayonnaise, pepper, curry powder, mustard, and salt.
  4. Combine the mayonnaise mixture with the eggs and stir until combined